Video Post Production: Everything You Need to Know
You’ve done all that great work during pre production and got the footage you needed when it came time to film. Learn the best video post production workflow to make your videos shine.
Prep – Done! Filming – Wrapped up!
Now, it’s time to piece it all together for the finished product in video post production. But wait! What is video post production, and what actually happens during this phase of a video project?
Video post production is the phase where you select the best shots, assemble them in an effective sequence, and enhance them with graphics, animations, or captions for your final video. But, let’s be honest, in reality, this stage can be one of the most time-consuming phases.
A lot of factors come into play when it comes to video post production—lighting and audio may have varied between shots, and you’ll have to tweak them for consistency. Also, post production video clipping or trimming may need to happen as you realize that the transitions you initially planned may not make as much sense now as they did.
To make the process smooth and swift, it’s essential to give equal attention to each phase. Careful planning and execution during video pre production and video production stages can make the post production phase much more manageable.
The Best Video Post Production Workflow to Follow
So you could potentially be wondering what is the difference between post production and video editing is. Video editing is a key component of the overall post production workflow, but before you think about editing, it’s time to get organized.
Create a folder for the project and name each file using the same convention, such as “Project name–item name–date.” Trust us. You don’t want to have to go digging, wondering what the heck “Video123” is for.
You’re likely super detail-oriented as an editor, but try not to get bogged down in perfection. When editing business video content, don’t worry about every little ‘um’ and ‘ah.’ Sometimes those human elements can add to the personal connection video offers as a medium.
You may not need all these steps, but we find this workflow helpful when preparing for video post production.
- Upload raw video files to your editing software.
- Trim clips as needed and arrange clips in the right order.
- Add your effects if you’re using them.
- Get feedback from fresh eyes.
- Edit your audio.
- Do color correction.
- Export and save multiple copies.
Follow This 7-Step Video Post Production Checklist
Now that you have a basic overview of the workflow that needs to be followed, you’re only one step away from achieving your standing ovation. Breaking the process down into a video post production checklist makes it easy to keep track of all projects and ensure nothing gets missed. Having all your ducks in a row gives you the peace of mind you need to start pulling your final video content together without any mistakes. So, stick to the checklist and prepare to present some outstanding videos!
1. Upload and Organize Your Raw Video Footage
Before importing your footage, get it all organized somewhere easily accessible on your computer. That way, uploading is friction-free.
If you want to make your life easier, name each clip something unique that tells you what is included within that file. That way, even though the thumbnails might be hard to see, you know which file you’re moving around without having to actually preview it.
Once you’ve got your raw footage straightened out, import the media into your video editor. This should be as easy as dragging and dropping, but it depends on the software you’re using.
Important note: if you have any graphics, audio-only files, or other video elements that need importing, upload them as well. It’s easy to edit when you have all your assets at your disposal from the very start.
It’s time to start trimming, right? Well, not quite.
Ensure the aspect ratios and resolutions are consistent across all your footage. The most common aspect ratios are fullscreen (4:3), and widescreen (16:9). And many social video formats fall into the 1:1 category.
If you have clips with different aspect ratios, edit one group to fit the other. This shouldn’t be an issue if you used the same camera for all your footage, but if you filmed some screen share video, that might be 16:9, but the video from your camera may be 4:3.
The same is true for resolution. 1080p and 720p are the most common, with 4K becoming more normalized. You can shrink higher resolution video down, but you can’t do the opposite, or else you’ll make your image really grainy. Ideally, everything you shoot will be at least 1080p but don’t be afraid to shrink a 1080p clip if you need to match up with some 720p footage.
2. Trim and Arrange Your Video Clips
Okay, now it’s time to start trimming. Watch through all your footage and see what needs to be removed. Basically, you will want to cut anything that you don’t want your audience to see. This might include the start of a video where you’re getting everyone set up or the end of a video when your subject asks, “Was that good?”
Hopefully, you shot more than you needed during video production, so there are a lot of shots and clips to choose from.
If you come across any funny bloopers, you might not want to cut them completely. Instead, you could cut them out of your main clip and drag them to the end of the timeline to create a blooper reel as well.
Now that you have your clips all cleaned up, it’s time to assemble them. Keep your video storyboard and script close so you can make sure your video timeline matches up. Once your clips are arranged properly, watch through again and see how the scenes flow.
You might find that you want to trim some more to improve the pacing. You also might need to sync up your audio with the video. This is most common if you recorded a demo or an audio voiceover and all your audio was recorded independently of your video.
Don’t forget to add your intro and outro if you have one. Whether these have your own personal branding on them or your company’s, they help differentiate your content from videos in the same vein. If this is the first time you’ve made the intro and outro files, make sure you save them so you can use them next time.
3. Add Effects to Your Videos
When it comes to adding visual elements to your video footage, incorporating effects can add value and make your content stand out. While many associate effects with big-budget movie special effects, they can span from simple text animations to elaborate transitions.
For example, effects can include graphics, speaker titles, images of your product, animations, or transitions. These options can elevate the visual appeal of your video content, as well as offer engaging experiences for viewers.
While video effects can present enhanced possibilities for improving your content, integrating them can be challenging. We recommend assessing the desired effect first and then determining how to insert it into your video using your editing platform. This approach will help ensure you seamlessly integrate your effect and accomplish your video’s overall aim in the final result.
For transitions, the simpler, the better. Sometimes, you might want something really cool, but for most videos, simple fade-ins and fade-outs will be your best bet.
4. Time for Review and Feedback
Once you think you have completed the initial rough cut of your video, it’s always wise to seek feedback from someone else. Evaluating your own work can be a challenge because you might look at it too favorably or be too hard on yourself. Asking for input from a fresh pair of eyes can provide valuable insight and help you improve the final version of your video.
Even if you’re a seasoned video creator or working under a tight deadline, it’s still crucial to have someone else review your work. This review process might even involve sending the video to your supervisor for feedback and approval. Taking these steps can ensure that your video reaches its full potential and makes an impact on your intended audience.
5. Edit the Audio
Editing audio is similar to post production editing video. You can trim, cut, or copy anything you want, and you can add audio effects if that’s something you’re interested in. At this point, the audio has likely already been synced up with the video and properly adjusted to fit your needs. With everything in its rightful place, the final output should be an awe-inspiring production.
There still might be some audio editing you need to do. Here are a few things you can do to level up your audio:
Smooth Out the Audio Levels
You should be able to see when your audio spikes throughout your video. This happens when there’s a loud noise, which might be too much for your audience to handle. The process for adjusting the spike is slightly different in every editing software, but you should be able to highlight just the spike and adjust the gain to the desired level. This will make your audio much smoother!
Correct the Sound
There might be some sound you need to remove. If you used B-roll footage, make sure to mute the audio associated with that track (unless you decide to use it, of course). There also might be some ambient background noise that you can remove with the “background noise reduction” tool that most editors have. If you need to cover up something like a cough or sneeze, you can take a short clip of “room tone” (the quiet baseline sound for that audio track) and use that to replace the noise. If you can’t isolate or remove an annoying noise, you can always…
Add Music
Music can add a layer of polish to your video, and there are tons of awesome royalty-free tracks out there. You might want to consider using rock or electronic music to add emotion and alternative, classical, or smooth jazz to supplement a speaker. With intros and outros, you have a bit more freedom, but you want something fun and memorable. Just remember to fade the music when someone is talking or at the end of the video.
Include Sound Effects
By adding sound effects, your audience’s attention can be directed toward new graphics that appear on the screen. While adding these effects, it is important to ensure that they are not overpowering or distracting. This can be achieved by keeping the sound effects subtle and minimal. By doing so, the sound effects can greatly enhance the viewing experience without being overdone.
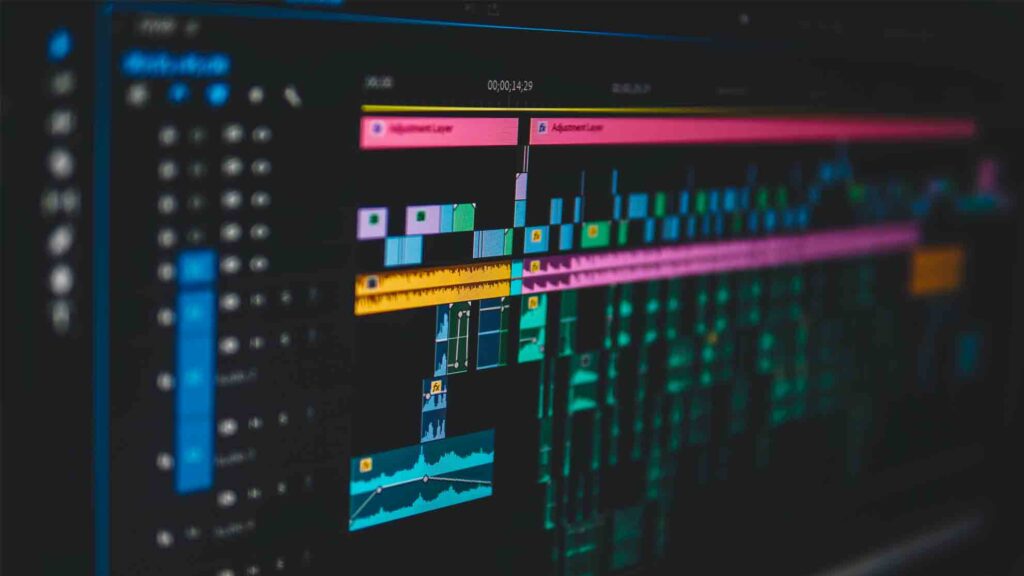
6. Correct the Color
Making small adjustments to the colors in a video can make a huge difference in the overall aesthetic. While it may not always be necessary, experimenting with saturation and contrast can help your video stand out by making it pop.
Additionally, color correction can be a lifesaver, especially if your clips were shot in different environments, as it can make them look more cohesive. Using adjustment layers, you can fine-tune the saturation, color temperature, and exposure of each clip to create a visually stunning final product.
But don’t stop there! Color grading, which involves intentionally skewing the color, can be an excellent way to create a specific mood. For instance, making your video slightly redder can create an atmosphere of action, while making it bluer can make it seem more dramatic. There are countless possibilities, and the only limit is your own creativity. So, take the time to experiment, play around with different color options, and have fun creating a video that truly stands out.
7. Save and Export
The final step in the video post production checklist is to save and export your polished video, but before doing this, you should keep saving your work while editing.
Although video editing software doesn’t always crash, it’s not something you want to risk when you’ve put in so much hard work to make your video look amazing. So, what’s the solution? Ensure all your raw video files and the project file itself are saved somewhere secure, like an external hard drive or a secure, shared drive on the cloud.
Once all the above precautions are taken, it’s time to take care of the final export. It’s important to carefully choose the settings for the high-quality export of your video. You can choose the video resolution and a suitable file type, such as MP4 or MOV, which are commonly used file formats. Experts usually recommend exporting final videos at the highest quality you can (usually 1080p but 720p is also acceptable), especially if you want to showcase your work on a big screen.
Now, all you need to do is sit tight and wait for the video to finish rendering. Congrats! You have completed the entire video post production checklist, and your final video is just about ready to be shared with the world.
How A Video Hosting Solution Can Help
Once you have your final video content. You need a place for it to live. Video hosting platforms like Vimeo or YouTube work great and should be part of your video distribution strategy, but what if you want to get more ROI from your content? That’s where a solution like Vidyard Hosting can help.
Video platforms offer a single, central space for hosting, sharing, organizing, and tracking your videos. Marketers can upload everything for distribution across the website, landing pages, and emails. Your sales team can record, share, and track who’s viewed their outreach videos. With video hubs you can create and organize topic or vertical-specific content for prospects, employees, or salespeople. And robust integrations let you pull video view data back into your CRM and MAP systems.
A platform like Vidyard helps you put all your hard work to work together and get those videos out into the world so you can see the benefits.
 Vidyard Hosting makes it easy to leverage the power of video across your business. Learn More
 Video Post Production: Not Too Hard, Right?
We’ve hit you with a lot of information, but don’t worry. Once you dive in, the pieces will start clicking together. It might take some time to get the hang of it all, but be patient with yourself. To be honest, video post production can take some time and can be frustrating. But, in the end, all the effort will be worth it when you have this stunning new piece of content that you can share with the world.
Plus, if you need to brush up on your video post production skills as you edit, we’re here to help every step of the way. We’ll give you tips and best practices to ensure your videos look professional and engaging. So, take a deep breath, and let’s get to work.
This post was originally published on September 23, 2021. It was updated on May 8, 2023.