 Prospecting and Intros
Stand out and improve response rates.
 Sales
SalesGenerate more pipeline and close more deals.
 Sales Support
Set your sales team up for success.
 Marketing
Host video content and convert viewers into leads.
 Converting and Closing
Connect with buyers and close more deals.
 Corporate Comms
Create and deliver an internal communications strategy.
See Vidyard in Action →
“Personalized Vidyard video messages drove an 8x improvement in click-through rates and a 4x improvement in reply rates.” Read More
 Blog
BlogThe secrets to virtual selling and video best practices.
 Video Agent Hub
Case studies and how-to videos for every revenue use case.
 Knowledge Base
How-to and help articles for all things Vidyard.
 Fast Forward
Expert advice on all things virtual selling.
 Templates
Free sales templates for every stage of the deal cycle.
 FAQ
FAQGet the answers to your top Vidyard questions.
 AI Resource Hub
Guides and ideas for using AI in your workflow.
 Case Studies
Learn how our customers win more with Vidyard.


Video Production Tips for Beginners
Sep 23, 2021
·
13 min read

Matthew Hastie

Ready to create your video? Discover best practices for video production, as well as video-making tips for sales reps, marketers, and social media content creators.
So you’ve finished all your pre-production homework, and now it’s time to actually make your video.
(If that last sentence made you think “what do you mean, pre-production!?”, then check out this guide.)
The actual “production” part of the video production process should be fairly short and simple if you’ve done your pre-work and planned. If you’re ready to press record and get the show on the road, read on.
Video Production Basics
If you’re just starting out with video, it can be a little scary. There are a ton of variables to consider and a lot of things to remember in order to make your shoot and production process go smoothly. But don’t worry—we have you covered.
How to Setup Your Video Production for Success
Don’t just show up on the day of your shoot. Make sure you’ve done your background work beforehand. And that you cover these bases so you’re ready for shoot day.
- Make sure all your devices are charged the day before
- Bring backup batteries on location
- During your location scout, do some filming to ensure everything looks good on camera
- Section off your filming areas with tape or traffic cones and let involved parties know the hours you’ll be shooting
Choosing the Right Lighting for Video Production
It’s best to be proactive when it comes to lighting your production. Natural light goes a long way with subjects looking their best just after sunrise or just before sunset.
If you use an indoor lighting rig, you can use a classic three-point setup to eliminate any harsh shadows. Use a key light on your subject’s “good side” and a fill light to illuminate their other side. Use a backlight behind them to differentiate them from the background.
The Importance of Shot Composition
Your shot composition is the way you arrange elements within your frame and helps you convey the story you’re trying to tell your audience. It’s best to follow the rule of thirds when setting up your shot. Divide the screen into three sections horizontally and three sections vertically. The four points where the lines meet are good spots for you to place your subject. Unless your subject is speaking directly to the camera, avoid positioning them in the very middle of the frame.
Unless you’re creating video content for social, stick to landscape over portrait mode.
Capturing Audio for Your Video
Audio tests are critical to ensure you capture high-quality audio at your shoot. Get your actors rehearsing while you set up audio to test sound. Be aware of background or passive background noises. That benign airconditioner humming in the background can totally ruin your shot. Using the right microphone is helpful in isolating the sound you want—especially shotgun mics, since they only pick up the sound that they’re pointing towards.
Once you have the room sounding how you want, record a minute or two of just silence. This is called “room tone” and will make editing the audio a lot easier. You might be editing around voices, and sometimes cutting out words can sound unnatural if the room has ambient noise. But you can use room tone to fill the void and make everything seamlessly flow.
The last step is to instruct actors to speak into the mics and not tap them. If they don’t have much video experience, they might need some practice with the mics, as well as some reminders to not touch them throughout the shoot.
Capture More Video Than You Need
This is your guiding principle. You can always cut away things in the editing room, but you can’t add them.
Don’t one-and-done each scene. It’s always a good idea to get a few takes of each scene to reduce the chance of a reshoot. If you capture too little and have to call everyone back together just to reshoot a single scene, you’re going to get plenty of side-eye from your production crew, as well as put your overall production timeline in jeopardy.
With video production can come a lot of trial and error—emphasis on the error. Even the pros have been there. Learn from their mistakes and join the Video Island Podcast team as they rehash past production mishaps with video producer Brennan Bell.

How to Use Your Camera Correctly
If you’re an amateur who’s just creating videos just for fun, the above advice should get you going.
However, if you’ve already created a few videos but you’re looking to step up your game, read on for filming best practices.
Understand Your Focal Length
If you’re a hobbyist, you’re likely shooting with a smartphone, which means you’re probably using a wide-angle lens. Unfortunately, these types of lenses make subjects closer to the camera appear larger, which can distort whatever you’re shooting. For instance, your nose might appear longer when using your phone camera.
To combat this, move the camera further away from your subject and zoom in. Don’t go too carried away, though—only move back five to eight feet, then zoom in by 20-30% maximum. Or use an add-on smartphone telephoto lens.
Level Out Your Shots
This seems like a given, but you’d be surprised by how many shots come out tilted. We recommend using a leveling app, which will let you know if your shot is on an angle. You can also enable gridlines on your camera preview screen.
If you have a little bit of cash to throw around, you can also pick up a cheap tripod. It’ll probably only run you $30-50, but you’ll never have to worry about the angle of your shots again.
“Tap” into Your Camera’s Capabilities
Your phone normally knows what to focus on, but sometimes it needs a little extra help.
Always tap your video subject on your preview screen. This makes sure your phone focuses on what you want, but it also allows you to lock the focus, usually by holding the tap or pressing an additional button.
When the focus is locked, you’ll be able to change the exposure on the subject to make your shot look exactly the way you want. (Keep in mind that your focus and exposure will change if your subject moves.)
How to Produce a Video Remotely
Need to put a production together, but lacking pro-tier equipment and filming spaces? You’ve probably already got a lot of the gear you’ll need.
You won’t always have access to recording facilities for every video you make. Luckily, one of the pillars of remotely produced video is your laptop webcam or your phone camera. And this works great for quick, off-the-cuff videos!
You also may have experienced recording via video conferencing software. If you haven’t, try it out! By recording your screen during a conference session, you can include multiple people in the video, or you can share your screen, which is helpful to provide a visual for what you’re talking about.
If you have a Mac and an iPhone, you can even use your Mac as the viewfinder for your iPhone camera. Usually, people do this to take advantage of the higher-quality rear camera on their phones.
What if you’re camera shy? That’s alright. There are a couple of strategies that will help you produce a quality video from home.
Use Stock Footage to Fill the Gap
Stock footage can make remote production a lot easier. It’s hard to go out and film what you need nowadays, but with stock footage, you can just look up exactly what you want to put on screen.
Even when you can shoot things yourself, using stock footage is an excellent way to spice up your video and provide more variety to your visuals.
However, while variety is your friend, you still want to make sure everything flows together visually. Choosing clips from the same creator can help, but if that’s not possible, just be discerning when selecting clips, and maybe send a rough-cut to a friend to get their opinion.
Our video team likes Adobe Stock, Artgrid, and Envato Elements for stock footage.
Incorporate Animation into Your Video
Animation has a reputation for being difficult and expensive, but it doesn’t have to be that way! Vyond is a popular animation tool that doesn’t require any expertise at all. It comes highly recommended by Vidyard’s customer experience team, who use it all the time. Check it out, and see what cool stuff you can come up with
Leverage Footage You Already Have
If you’ve produced some videos before, see what you may have left on the cutting room floor. While it may not have worked in the past, it might be the shot you need for your current project. Don’t be afraid to use some already-used footage as well. Putting it into a new context and mixing it with new footage (whether it’s stock footage or filmed by you) can breathe new life into those clips.
Video Production Tips for Sales Reps
If you or your sales team is ready to leverage the power of video for sales, we’ve got some best practices to cover in the next section.
Video is a powerful sales tool when you know how to use it. With sales, you want to stand out, which means presenting yourself as someone personable and knowledgeable. Of course, you also want to demonstrate the benefits of your solution, but people buy things from people, so we want to make sure you can create a connection with your prospects.
Here are our tips for producing a great sales video.
Get more responses and book more meetings with video prospecting.
Decide on What Type of Video You’d Like to Create
Choosing what type of sales video you should create is the best first step.
A Webcam (Selfie) Video
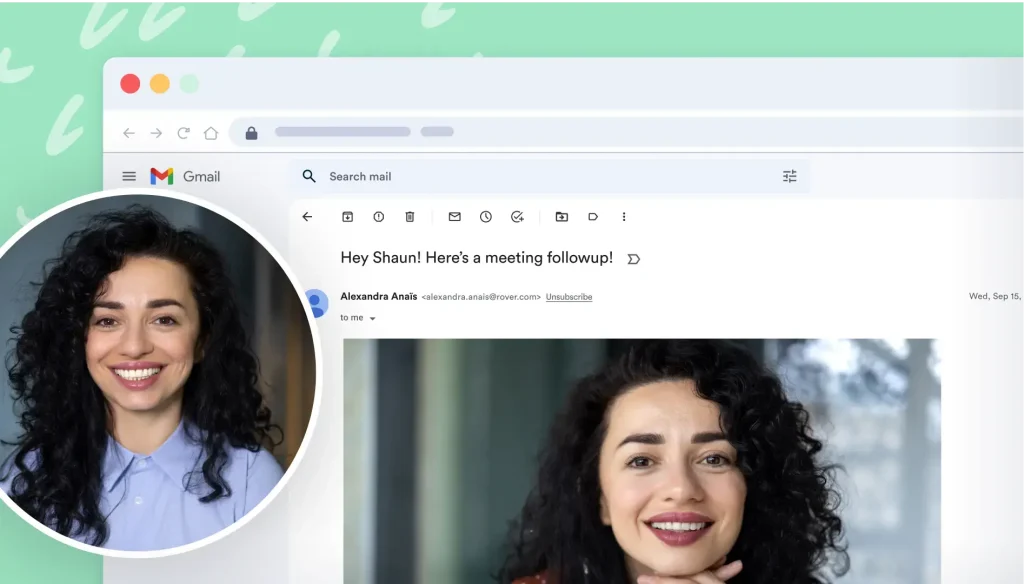
These videos provide you with a nearly face-to-face level of connection with your prospect. They’re great for relationship building and introducing prospects to yourself, your team, or your office. Because of this, webcam videos are amazing for cold outreach. Prospects are more likely to be interested in meeting with you if they get sent a short selfie video instead of a long-winded email.
In this example, Vidyard reps use a selfie video to help put a face to a name for new customers with a personal video message.
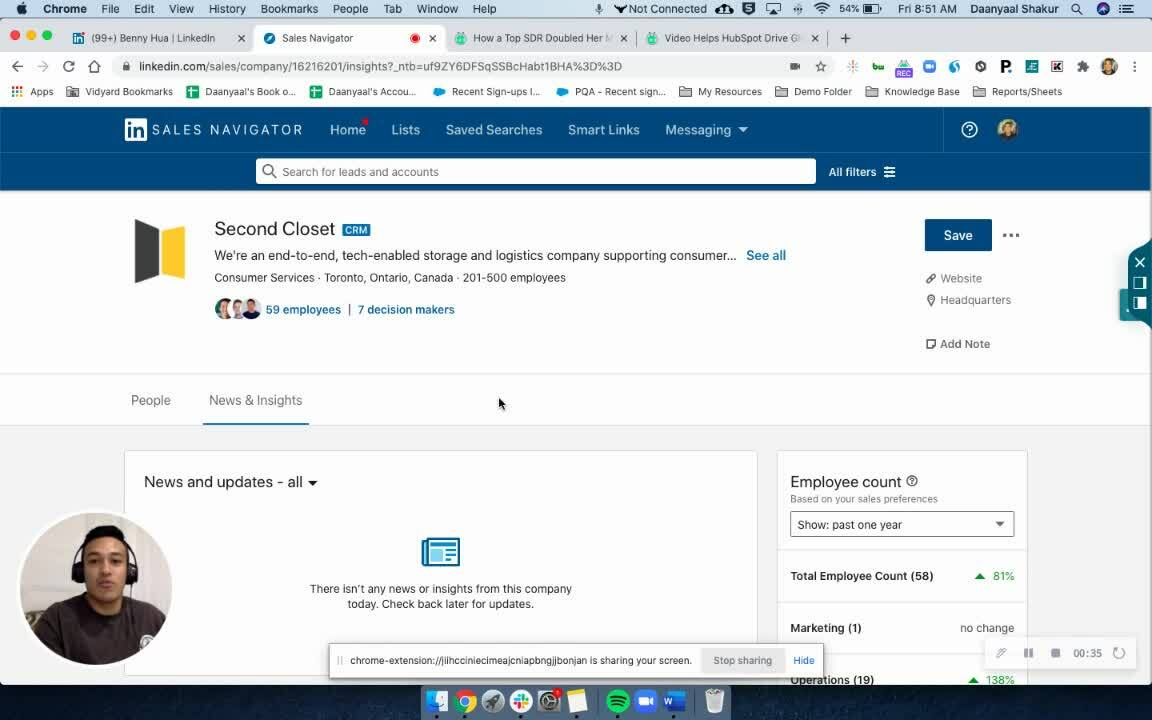
A Screen Share Video
Using a screen share video, you can turn what might be a long meeting into a quick and digestible video that they can refer back to and share around within their team. You can show your audience why you reached out or what they need to do. Tour them around your platform, their website, their LinkedIn page, or really anything else you want to discuss. You can even record a hybrid video (a selfie plus a screen share) to get the best out of both formats.
Show your prospect that you can meet their needs by screen recording a talk-through of their LinkedIn profile in your first touchpoint.
A Video Playlist
Not a type of video, per se, a playlist is a collection of videos you can curate for your audience. And they’re a great way to combine your screen share videos and selfie videos with pre-recorded content. By making a playlist, your prospects can get all the benefits of a thorough explanation and high-production-value content without you needing to start from scratch every single time.
Learn how to upload videos into your video library as well as how to combine them into a playlist by visiting the Vidyard Knowledge Center.
Choose Your Location Wisely
You want a spot that’s quiet and has good natural lighting. Try facing a window—this will light your face really well. However, this only works during the day, so consider the time you want to shoot as well.
Your location should also look professional. Clean up your background, so it’s nice and tidy. The background of your office (whether it’s at company HQ or home) should be sufficient, but again, make sure everything within your shot sends the right message.
Tailor Your Message
Why are you reaching out? Why now? What benefit are you providing? These are questions that will be different for every person you reach out to, so give some thought before filming.
Showing why someone should care about what you have to say and then explaining it will get them invested and indicate that you did your research. Don’t give everything away, though—you want your prospect to be interested enough to respond.
Be Mindful of Time
As the adage goes, time is money! Keep your cold outreach videos to approximately 30 seconds. Think of these videos as an elevator pitch. Once you have their interest, your later videos can grow to a few minutes in length as you send them explainer videos or follow-ups.
Use an Eye-Catching Thumbnail
You want your video to stand out and make prospects curious. The best way to make a good first impression is to use an eye-catching thumbnail. Using a GIF as your video thumbnail is exceptionally eye-catching and can tell a story if you use it right.
Accessibility tools like screen readers, unfortunately, can’t read video thumbnails, so to make them accessible, there are a couple of things you’ll need to do.
- Keep them to five seconds or less
- Make sure there are no blinking/flashing lights
- Add alt text if possible
By doing these three things, you can keep your video accessible while still leveraging the power of animated thumbnails.
Be Interesting
This one might seem like a given but stick with me for a second. Just because someone clicked doesn’t mean that won’t zone out. We’ve all been there—you start a video, and then immediately stop paying attention.
So get to your point fast. Draw them in and tell them what they can take away from the video. This might be a little hard at first, but experiment with it! Test different ways you can balance being informative and entertaining and see what yields the best results.
Video Production Tips for Content Creators
Regardless of role, more sales and marketing pros are becoming content creators and building their professional brands across social channels. If you’re looking to up your social media game, video content is quickly overtaking other media types. Platforms like Facebook, Twitter, and LinkedIn, which traditionally focused on text-based or static image content, are embracing video. Even the historically image-heavy Instagram is reprioritizing video content. Here are our tips for creating video that’s successful on social media. Here are our tips for creating video content that’s successful on social media.
Keep the Quality High
Even though you’re not creating highly produced brand content, you still need to keep your audio and video quality high. In fact, some algorithms (like Instagram Reels) will deprioritize videos that are blurry or have low resolution.
Luckily, your phone should do the trick! Just keep the basics in mind, and grab a cheap tripod if you need help keeping your shot stable.
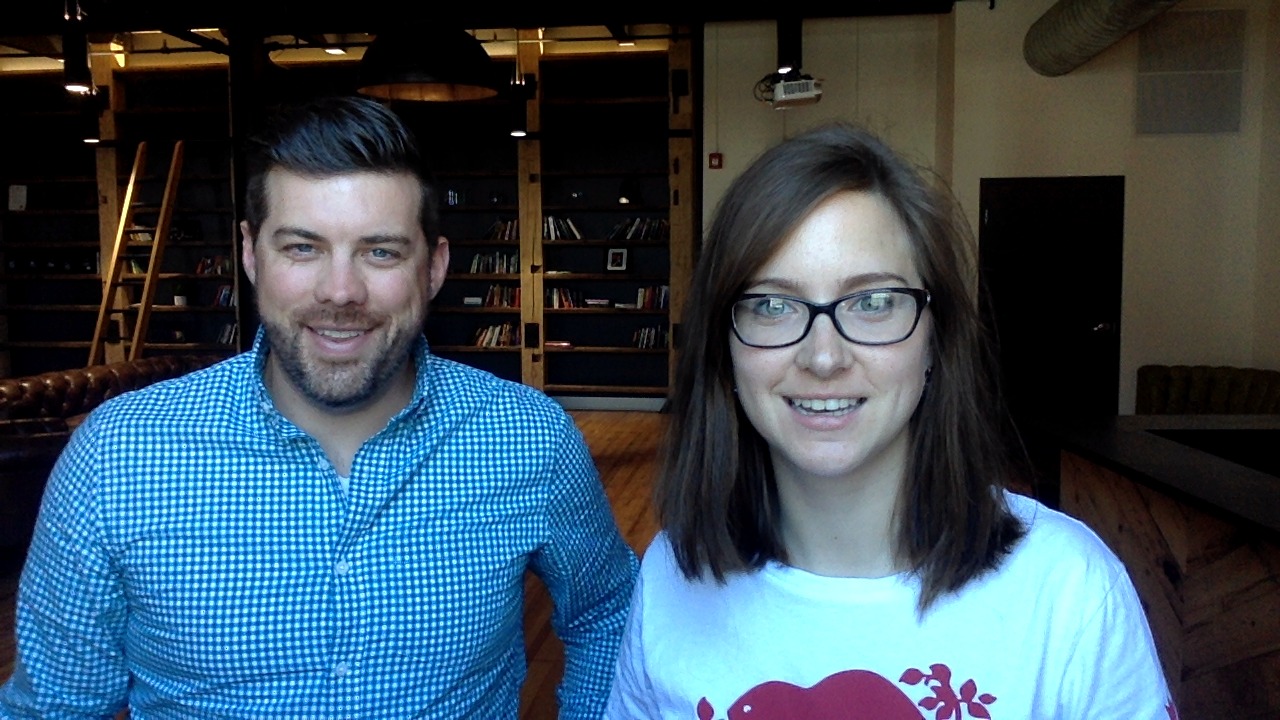
Put a Face to the Name
Showing your face is the best way to make a connection with your viewers. It creates a sense of trust with your audience, and it shows that you’re just another person. This can be a great way to kickstart growth because with more trust comes more comments, likes, and shares.
Take a look at this video made by Vidyard’s Social Media Manager, Charlie, who shows himself to endear himself to the audience.

Choose the Right Sound
Sound is more important than you might think. Of course, you want it to be clear, but do you want background music? If so, what should the tone be? Or does your video even need dialogue? Will a simple song do the trick?
There’s a lot to consider, but you have to see what you vibe with. It might be a lot of trial and error, but it’ll be worth it in the end.
Have a Strong Hook
Remember, you’re competing with an entire platform full of great content. So what makes yours stand out? You need to capture the audience’s attention within the first few seconds, or else they might scroll off your video.
Think about what makes you interested in watching an entire video—maybe it’s a fun fact, or a surprising statistic, or even an interesting question you intend to answer within your video. Regardless, you need to draw your viewers in right away, or you won’t see the results you want.
Keep it Structured
Your content is going to be more successful if people can easily follow it. By having a clear beginning, middle, and end, you can make your video more approachable for your audience. Something like a short numbered list is an effective way to make your content digestible. Or, if you’re telling a story, make sure you follow the basics of storytelling by having a clear introduction, a rising action, and a falling action, and a solid conclusion.
The easier your video is to consume, the more likely people are to jump in and interact with it, which will make it more successful with the algorithms.
Add Text and Subtitles
Captions are crucial from an accessibility perspective, as they help those who are Deaf or hard of hearing enjoy your content.
However, a lot of people scroll through their feeds on mute, especially on apps that aren’t exclusively video. So adding captions makes it easy for them to engage, which can lead to more interactions and shares.
And now, it’s easier than ever! Instagram has added a “Closed Captions” sticker, TikTok is rolling out auto-captions, and Facebook, Instagram TV, and YouTube generate captions automatically.
Text, for titles or emphasis, can also be a great way to add some flavor to your videos and make them stand out—even if there is no dialogue within the video itself.
The text style should stay the same across all your videos. It’ll help you establish your own unique identity as a creator.
Go Out and Create!
While this blog is a great starting point, the best way to learn is to go out and start filming. You can always refer back to this blog to help you get started, or for tips and tricks, but the best way to learn is to get hands-on and sink your teeth into a project. Next up, you’ll be moving onto the post-production process, which has its own learning curve, so get ready.


